Laminate Flooring Tricks And Tips

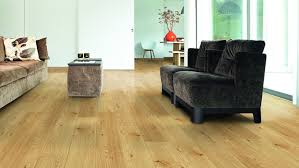
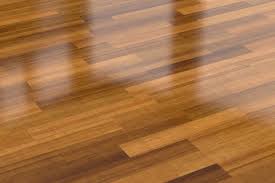
Best Methods for Cleaning Laminate Floors

Ever take a look at your laminate flooring and just think it looks blah and dull? Over time flooring can lose its shine and spark that it once had, leaving you unhappy with your homes’ appearance. Between the constant flow of traffic and the usual day to day mishaps, you might notice your floor starting to look less vibrant. Here are a few do’s and don’t’s of how to restore laminate floor shine.

DO: Clean Regularly

Sweep your floor a couple of times a week, if not every day, to remove debris from your flooring. Those little bits of rock and dirt that hangs on to your shoes, can become ground into your laminate, causing micro scratches on the surface. This will leave your laminate flooring looking dull and uninviting. You should also mop regularly with a cleaner specialized for laminate flooring. Other products can cause build up over time, which will dull your flooring.

DON’T: Use Wax

Never use wax. Unlike wood, wax on laminate will leave a dull hazy look. Not to mention the residue the wax leaves collects dirt and build up making cleaning your laminate next time a little harder. Laminate flooring does not need the upkeep that hardwood flooring does and should be treated like a separate type of flooring. If a cleaner/maintenance product says it’s for hardwood floors, it’s best to leave it on the shelves.

DO: Make Your Own Cleaning Solution

Create your own natural solution. We recommend using a mixture of water and vinegar to bring the best shine back. This is a smart solution as it is cheap, resourceful, and easy to do on your own. Since vinegar has anti-bacterial properties, it will remove any residue and give a thorough clean to your floor!

How to Clean Laminate Floors

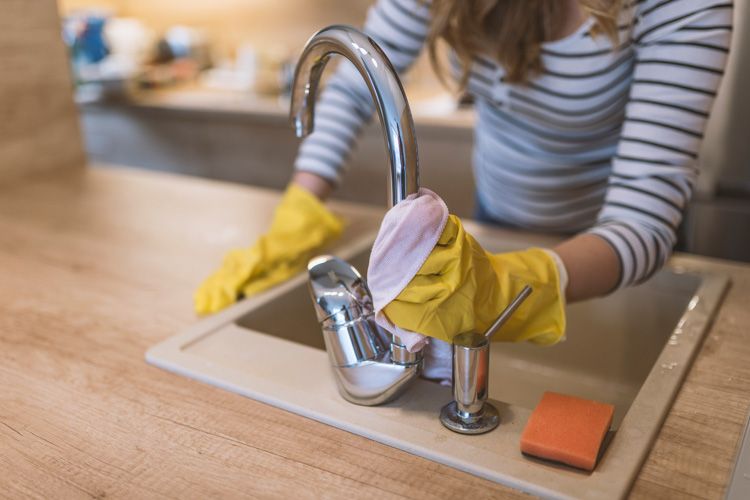
The best way to clean laminate floors is to spray an appropriate cleaning solution onto the right kind of mop, wipe the surfaces, and make sure they dry quickly. It’s as easy as that! Just remember to:

Choose appropriate cleaning products and methods to prevent damage to your floors.

Microfiber mops are your best choice when it comes to cleaning laminate floors.

  • Remove larger particles first – use a dry mop or a vacuum cleaner with a soft bristle brush to clear away hairs, grit, crumbs, etc. Otherwise, the particles will get spread around when mopping the floor and will leave streaks and residue behind. They can even scratch and pit the laminate surface;
  • Use a cotton, terrycloth or microfiber mop to clean laminate floors – those mops can quickly cover large areas, easily get under tables and chairs, and efficiently pick up all the accumulated dirt and dust. What is more, they require little water which is of paramount importance as laminate flooring will warp if exposed to too much moisture;
  • Purchase a specialized laminate floor cleaner (strictly follow the usage instructions and always test a product you haven’t used before on a small inconspicuous area first) or prepare an effective home-made solution out of three parts water, one part vinegar and just a squirt of mild dish cleaning (or glass cleaning) liquid. Put your cleaning solution in a spray bottle and get down to work;
  • Dampen the mop pad with hot water and spray the cleaning solution on it;
  • Mop the floor without scrubbing or pushing too hard. Rinse the pad when it gets too dirty (you will not need to rinse the pads often, so there is no need to haul a bucket of hot water around the house) and replace it if you intend to clean more than one room. You can machine wash dirty pads afterwards and use them several times, so purchase a couple of spare pads and don’t hesitate to replace them whenever necessary;
  • The floor should dry within several minutes after cleaning. If you have used a proper cleaning solution and a microfiber mop, there will be no streaks left.

What to Avoid When Cleaning Laminate

There are plenty of no-nos to consider when it comes to cleaning laminate floors, so follow these tips to avoid damaging the surface or the layers of the flooring.

  • Do not use steam cleaners. The heat and moisture will affect the glued layers and result in water damage over time.
  • Do not soak the floors with a drippy mop.
  • Bristle brooms have a tendency to leave behind particles that can contribute to surface wear; it’s best to stick with a soft microfiber dry mop.
  • Avoid products that promote a shine. The waxy buildup can be difficult to remove.
  • Do not use wood cleansers, like Murphy Oil Soap. It will leave residue on the surface and look streaky.
  • Avoid abrasive scrubbers, like scratchy sponges or steel wool. Even baking soda, when applied and rubbed aggressively, may damage laminate floors.
  • Vinegar, though a popular ingredient in homemade cleansers, is highly acidic and can break down the surface of the laminate when used in high concentrations over time.

How to Protect Laminate Floors

  • Wipe up wet spills immediately. Water + Laminate = Disaster.
  • Use glides or pads on the bottom of your furniture.
  • Try to lift furniture as you move it or place carpet or padding under heavy furniture as you move it across laminate flooring to avoid scatching the surface of the laminate floor.
  • Place mats under your furry friend’s water bowl and consider a mat under your baby’s high chair.

Here are some general floor cleaning tips for this type of flooring:

Vacuum Cleaner:

It’s convenient and it’s important to vacuum your laminate floors frequently to remove dust and grime. The dust has abrasive materials that can cause scratches.

Wet Cleaning:

Wet cleaning is recommended to clean laminate floors once a week or less. You can use a soft microfiber cloth. Always clean floor plank lines. Use only a damp cloth as the water can damage laminate floors. It is recommended that you only use the laminate cleaner recommended for cleaning your floors.

Things To Avoid:

You should not use wax, varnish, or any product based on vegetable oil, cleaning powders, sanding pads, or steel wool to polish or clean laminate floors. This product damages the floor surface. Also, avoid using cleaning products such as vinegar, ammonia, or floor cleaning solutions that contain chlorine. Every time you use them, it eats away at the surface, making it dull and removing the top protective layer.

Cleaning Fluids And Spills:

If the liquid is spilled on the floor, it must be cleaned immediately. It can stain the floor or get into the seams. Use a paper towel or soft cloth to wipe and soak up any spills. Moreover, neutral detergents, nail polish remover, or acetone can remove grease, permanent markers, or paint stains.

How To Maintain Laminate Floors

Laminate floors are a great addition to any home. But, the problem comes into play when you’re not sure how to maintain your flooring and restore it if some areas need repair.

It’s a good thing that you’ve clicked on our post because we’re going to give you some tips to help you upkeep your laminate flooring and enjoy it for more years to come.

Mop the Floor Regularly

Mopping your laminate flooring can ensure that any of the spills or stains don’t remain in the flooring after you’ve cleaned it. When mopping, however, you need to ensure that you don’t use too much water.

The reason for this is because laminate flooring is made of something called presswood. When you oversaturate the flooring with water, it can cause the floor edges to begin to curl, and then you’ll be looking at repairing those areas of the floor that have started to swell.

When mopping, dampen the mop shaking off excess water, and then proceed to mop your floor.

Sweep

It can be easy for dirt and particles to become trapped in your flooring, which brings us to our next tip. You need to sweep the floor regularly. Depending on the type of broom you’re using, it can be challenging to get into all of the spaces that dust can get trapped.

If you cannot reach these places, the next best thing to do is grab your vacuum. Using the vacuum attachment, you can easily get the spaces where a broom won’t reach and remove all of the trapped dirt.

Ensure that you change the vacuum setting so that your floors don’t become scratched while you’re trying to clean it. The last thing you want to do is destroy your flooring because you didn’t switch the vacuum setting.

Etiquette For Wedding Videographer Tipping

The Top Three Things Your Wedding Video Should Include

Planning your wedding and reception is a full-time job that can have huge returns for yourself, your partner, and your family and friends. The wedding is sure to be an emotional, life-changing moment and the reception is guaranteed to be a party that no one is going to forget soon. However, having a way to relive the day at the height of its glory is absolutely paramount. So we’ve put together a list of the top three things your wedding video should include so as to assure you don’t lose a moment of it!

First, make sure your videographer gets the personal vows on film. Adrenaline is running so high during the ceremony that it can be easy to remember only snippets of what was said to each other. Whether your vows are self-written or quotes borrowed from others, being able to relive that moment is a huge part of the wedding video.

Next, it’s not just what was going on, but what was said. Having fantastic audio makes a wedding video. Speeches, first dances, toasts, and candid banter between guests should all be highlights in your video. Make sure the audio tech and your DJ or band is working together so that nothing gets lost in translation on film.

Finally, pick a videographer who can find the character in your wedding. Whether it’s the mother-of-the-bride crying during the exchanging of the rings or the best man cracking up at an inopportune moment during toasts, be sure to catch it. Yes, your wedding is about the two people exchanging vows, but it’s also about remembering those candid moments from your family and friends. Catch not only the actions, but also the reactions.

Types of Wedding Videos

Ultimately, your wedding video will be determined by the style. There are multiple types of wedding videography. The most popular are:

  • Documentary
  • Cinematic
  • Short Film
  • Highlights

Documentary and cinematic styles are longer, anywhere from 30 minutes to an hour, if not more. Documentary wedding videos may include short interviews with family members or other wedding guests, as well as other moments of you as a couple leading up to your celebration, such as the proposal or when you first met.

A cinematic style is known for aerial views of the wedding venue, slow-motion features, and narration or moments of dialogues like you’d expect from a movie. Talk through options with your videographer to discuss what is most impactful, and then pick and choose from the effects of what you like best.

The short film and highlights videos are normally under 10 minutes, with many running three to five minutes. Each is special in their own right and captures the best moments from the wedding ceremony with the addition of filters, music, and other elements, such as voice-over narration or text. Not all videographers include all of these effects during the editing phase. If there are any that you’re drawn to, make it known to the vendors that you’re meeting with to confirm that they’re able to handle that detail.

How Long Does It Take to Receive the Wedding Video?

The time of delivery is dependent on how long your wedding video is, but if you’re working with a production house, they may have a team of editors that help put together multiple videos on a consistent schedule. Most vendors, whether an individual or organization, take several days to gather footage, add special effects, such as music and filters, and edit down to the requested length. Your videographer should give you a timeline of when to expect your video and check in with you regarding updates.

Tips for a Great Wedding Video

Stage a Movie Marathon

Start by scoping out potential videographers’ work from previous weddings. Once you get past the Groundhog Day similarities — another bride, another groom — you’ll be able to focus on the differences in your emotional reactions to each.

Then, settle in with some films you respond to visually — note the colors, light, and mood — and give that list to your chosen videographer to use as an inspiration board, along with important elements and a list of the guests you want him or her to target. Better yet, supply photos of your VIPs so you won’t need to point them out on your day. The more specific you can be, the better.

Decide About Dialog

When it comes to wedding films, including the original audio is a whole other ball of wax, and it’s something you should discuss with your videographer at the outset. I made a creative decision early on not to record audio on my jobs — I think getting the best man’s “when we were in college” toast can take a video off the rails. Besides, you don’t need audio to see the looks on the bride’s and groom’s faces.

Be Realistic About Run Time

The 21st-century attention span has been shortened to mere minutes, if not seconds, so I zero in on the moments that tell the emotional story of your day: hands grasping, biting of the lower lip, the loss of breath before “you may now kiss the bride.” That’s what you’ll want to see in the years to come.

Adjust Your Music Expectations

Because of the way media travels online these days, you can’t get away with setting your wedding video to, say, a Radiohead tune without securing the band’s permission. All music has to be licensed. But you can find something similar to Radiohead on websites designed for this purpose.

Coordinate Your Camera Crew

Videographers and photographers are used to working around each other — cooperating so that they’re not getting in each other’s shots — and you’ll only benefit from putting your photographer and videographer in contact as soon as possible. I usually meet with my counterpart beforehand and draw up something like a football playbook: You go left, I go right, stay at a certain angle. If there’s a scene know I really want, I’ll set it up so that I can shoot something without the strobe of a lot of flashbulbs firing.

Top Tips on How to Prepare for Your Pre-Wedding Video

When you’re preparing for your pre-wedding video, it’s important to follow a few processes to get the best quality video possible and to make sure you arrive fully prepared. Let’s take a closer look.

Keep your ‘look’ as close to your natural selves as possible – Don’t, for instance, decide to go with a massive image overhaul at the last minute. Any extreme imagery of you can make for a video where it will be difficult to recognize who you are, which may make you feel disappointed with the finished result.

Plan ahead with regard to your concept – For instance, if wish for your video to be filmed at a bungee jump, discuss with your videographer in plenty of time. The same goes for any required planning, such as outfits, makeup, and hair. Give yourself adequate time to get these in place before the shoot.

Don’t forget about your partner’s wishes. Make sure you’re both happy with the concept and style of shoot, as its a representation of your love story

Long Moving Companies To Move Your Belongings To Faraway Locations

Stress-free is the way to be: a moving customer’s guide

Generally, when you see a post on a moving company’s site about how to have a stress-free move, it’s “hey, hire us!” While hiring a reputable mover usually makes for a better move, this post isn’t from our perspective; it’s a customer guide just for you.

moved with us this year and wrote her takeaways in a step-by-step guide to a stress-free moving day. She and her husband had undertaken long distance moves before, but it had been a long time since their last move, so it felt like a brand new experience all over again

If you’re about to move — no matter what distance — you’ll want to read customer guide post before you get started with your moving logistics. Her guide will help you plan out your move, making sure you leave enough time for each piece of the moving puzzle.

Complete Moving Guide

Checklist of What to Do When Moving Out

Make a moving budget

Contact everyone who needs to know about your change of address

Book a moving truck

Declutter and host a yard sale

Gather packing supplies

Pack your stuff!

Load the truck

Create Your Moving Budget

Wondering how to move cheaply across the country? Take control of your expenses by creating a moving budget early in the process. Research typical costs, then set a realistic budget that works for your needs. You’ll thank yourself later!

The Truck

It can be hard to get a pulse on the real cost of renting a moving truck. So break the costs down into smaller segments:

Rental Costs: The truck itself is your biggest expense. Choose the right size of truck to save yourself the time and money of multiple trips. (Stay tuned for tips on how to figure out what size moving truck you need.)

Insurance: Don’t skimp on insurance just to save a buck upfront. If you get in an accident during the moving process, insurance could save you a lot of money in the long run.

Gas: Most moving trucks come with a full tank of gas, and then you’ll need to pay for gas while you’re in possession of the truck and also return it with a full tank.

Towing Rentals: Towing accessories are an ideal way to get your car across the country if you don’t have someone to drive it for you.

Moving Equipment

Make sure you leave room in the budget for renting and buying moving equipment like dollies, furniture blankets, and moving boxes. Though you may be hesitant to add to your moving costs, you will ultimately save money by avoiding damage to your furniture and other possessions.

Travel Costs

Making a move across the country? If so, you will need to budget for travel costs on top of gas for the moving truck. Account for expenses like staying in a hotel and dining out while en route to your new home. You may also be paying for some family members to fly across the country while some of the family drives in the truck. Make sure you also consider how you will be getting your car across the country, such as shipping the vehicle or towing the car behind the moving truck.

THE ULTIMATE MARKETING GUIDE FOR MOVING COMPANIES

How Moving Companies Are Increasing Leads, Booking More Moves, and Growing Revenue

When’s the last time you opened up the phone book to find the phone number of a business? Years ago? Same here. The internet has changed the way moving companies, contractors, and other local businesses advertise to new customers. Gone are the days of the Yellow Pages, which was quickly replaced by Google. Below, we’ve outlined the exact strategies our mover marketing experts use to grow website traffic,

Moving Company Marketing Strategy: Build a Top-Notch Website

Just like with any other business, good moving company marketing begins with a well-designed website that attracts visitors, gives them the information they’re looking for, and keeps them coming back for more.

Did you know that 80% of customers look online for home services like moving companies? Or that 33% of customers click on the first search result they see on Google? Your moving company website is the initial interaction people have with your business so it’s important to create an incredible first impression.

KEY ELEMENTS EVERY MOVING COMPANY’S WEBSITE MUST INCLUDE

There are four key lead generation elements every moving company’s website should focus on:

Website design – A well-designed website is great to look at but, more importantly, it keeps website visitors engaged with your site. And the longer they stay, the more likely they are to convert into a lead and hire you for their next move.

Sticky header and navigation – Your website’s header and navigation should be simple and information should be easy to find, particularly on mobile devices. At least half of buyers use a mobile device as their device of contact to start a search.

Page speed – Faster web pages make for a better user experience. Page speed (or how many seconds it takes your website to load for users) is also a search engine optimization (SEO) ranking factor.

Responsive layout – More than 50% of all website traffic today comes from mobile devices. Your moving company’s website should be built in a responsive layout, meaning the site automatically resizes to fit users’ screens based on what device they visit your site on (e.g. – a desktop computer, laptop, tablet, or smartphone). Google’s algorithm also rewards mobile-friendly websites with higher search rankings than non-mobile-friendly sites.

Where or how high you rank on Google is determined based on how well you’ve optimized your website’s:

Site code and structure – Does your website load fast for users? Can search engines easily find and crawl your website? Is your website’s internal linking structure optimized for SEO? These are all important aspects that can have a considerable impact on how high you rank on Google search results.

Onsite content – Do you have a web page for every service you offer (long distance moves, local moves, piano moves/gun safe moves, packing services, etc.)? Every web page on your site is a new opportunity to rank on Google. Optimize your web pages and the content on them for better search rankings.

Offsite factors and reviews – Does your company prioritize generating reviews on places like Google My Business? Are your online directory listings 100% consistent across every platform? Optimizing your entire web presence (not just your website) gives your moving company the best chance to rank on page one of Google.

Guide Moving

Department of Public Utilities (DPU). The DPU helps you by setting certain licensing and insurance requirements which movers must meet and by investigating complaints if you have a problem with your mover. No matter where you are moving or whether the move is large or small, you should take the time to carefully plan your relocation.

How can I select a reputable mover?

A personal recommendation is the best way to start. Whether you use a company recommended by friends or choose a company through its advertising, be sure that any company you contact has an up-to-date DPU operating certificate number.

They are subject to state laws and the Department’s rules and regulations.  For example, movers licensed by the DPU are required to carry a minimum amount of cargo insurance.  However, your ability to recover for loss or damage is dependent upon your agreement with the mover.  All movers are also required to file the rates charged for various moving services.  These rates are called a tariff and they are filed with the DPU and available to the public.

How important is obtaining an estimate?

A written estimate where a company representative comes to your home is one of your best safeguards against overcharges and other potential issues. Verbal estimates over the phone or email are non-binding.  To obtain a reasonably accurate estimate, you must show the estimator everything you intend to ship.

An estimate is not a bid or a contract and choosing the mover submitting the lowest estimate will not assure you of the lowest cost move. Regardless of any estimate provided, the final amount you must pay for your move is determined by the hourly rate, the amount of packing completed, and any other additional services performed by the mover.

A quick guide

Secure a home when moving

It might seem like an obvious one, but many people wait until the last minute to find a place they can call home. Let’s say you have gotten a better job The last thing you should do is wait for your moving day to approach in order to start looking at properties. It doesn’t make much of a difference whether you want to purchase a house or rent it.

That being said, it might be a good idea to work with a real estate agent. They are familiar with all the listings, which means they will be able to match you with a property that fits the description of the home you are looking for.

because you know so much about the place that you love it or was it due to circumstances? Either way, the best way to adjust to your life after the move is by learning as much as you can about your new home. Research the best restaurants, the closest hospitals, the most important events. Knowing where you can go to unwind after your long-distance move will help with the post-relocation stress and anxiety.

Find a moving company you can trust

Any time you find yourself on the cusp of relocation, you have two choices – you can either attempt a DIY relocation or you can find a professional moving company to assist you. If you feel like you have the time and energy for a solo relocation, then that’s a great way to save some money. However, if you feel like you could use all the help you can get then,

You don’t need much to find a moving company you can trust – you just need a stable Internet connection. Search through the moving companies in your area, request free moving quotes, and find a company with the best quality to affordability ratio. And always make it your mission to read the comments people have left on their website. Also, check out the comments on different online forums. That will be a great indicator of their level of quality.

Queries From A Divorce Lawyer For Making The Process Easy

How to Choose a Divorce Attorney

The best outcomes in family court happen when the client has the right attorney on her team. ­­This article will walk thru how to choose a divorce lawyer and provide step by step instructions for choosing a divorce attorney.

Finding the right attorney for you the very first time can save you thousands of dollars and hours of heartache. Use this guide to help you screen for a divorce attorney and hire the best divorce attorney for you.

How An Attorney Can Help

Family law is personal and there is nothing more important than protecting your children, your future, and your financial security. Sometimes, people are able to get divorced without attorneys when the issues are simple or both husband and wife agree on what they want. Sometimes all that is needed is an hour or two with an attorney to allow someone to navigate the muddy waters divorce on their own. Other times, attorneys can be necessary for more when dealing with an unreasonable opposing party, a bully of an opposing attorney, or the issues are complicated.

There may be tricky issues that apply to you and your divorce. For example, Social Security claiming strategies could be very important to you if you are approaching retirement. After at least ten years of marriage, you qualify for Social Security spousal benefits. Similarly, if you want to pay off debt, you may be able to use your divorce as a way to avoid penalties for early retirement withdrawals.

A lawyer can also advise you if an unexpected problem comes up, for instance, if your spouse files for bankruptcy before you receive money due to you in a property settlement. Likewise, a lawyer may be able to help you creatively get rid of debt by using the bankruptcy of one spouse to wipe out the community debt of both spouses.

An attorney can help facilitate proper service of court paperwork on your spouse. A lawyer can advise you on how much money, if any, you should pay or receive for child support, or whether you may be entitled to or owe spousal maintenance.

Working with an attorney ensures you are protecting yourself and your children.

To find the best divorce attorney for you, I recommend that you meet with, or consult with, several attorneys.

What else does your attorney need to know?

What are the current issues you are facing? Who are the players? For instance, is the new wife a major problem for your children? How old are the children and how do they feel about the situation? We really want to understand the dynamics and background of what has been going on with your family. Tell us your story. We want to understand what keeps you up at night and what your primary objectives are. What is the ideal outcome? How do you picture yourself a year from now? Where do you live? Where do you work? What is the schedule you have with your children?

Payment Considerations

Do you have special payment terms or parameters that you are looking for? We try to accommodate a variety of needs and budgets. By having an idea in advance of your budget or budget parameters, we can best design a solution that fits your needs. For instance, if your grandmother is giving you the money, but she will give it to you over a three-month period of time, let us know. We can design a system to meet your needs. Do you have deadlines that must be met that have not already been addressed?

Finding a decent divorce lawyer? Here are a couple of proposals:

Recommendation #1-Ask a Lawyer

In the event that you know a lawyer, ask him/her for a referral to a decent divorce lawyer. The individual will likely know somebody or a few someones who dedicate a huge segment of the act of law to detachment and divorce and related issues. For instance, I have been dealing with partition and divorce for a long time and have an incredible notoriety among the nearby legitimate network. Any divorce lawyer worth his/her salt ought to have set up a notoriety among different lawyers. Lawyers for the most part realize who is useful for a specific sort of case; they unquestionably know who they would see, on the off chance that they were confronting partition and divorce.

Proposal #2-Yellow Pages/Internet

While not an extraordinary wellspring of data, the Yellow Pages and web can be a starting wellspring of lawyer names. Lawyers who don’t specify partition, divorce, military divorce, and related regions like authority and backing or property division, are not looking for cases in those territories and positively don’t give a critical segment of the training to those regions. Be cautious of advertisements that incorporate a clothing rundown of all things everywhere. Recollect the familiar axiom, “a handyman and ace of none”? Wouldn’t you rather have somebody who sets aside the effort to center in any event a lot of time to family law, than somebody who perhaps commits 3% of his/her training to family law issues? Recall not every person promotes in the Yellow Pages or haw a site or web nearness.. For instance, there are more phone postings than there are lawyer advertisements in the Yellow Pages.

Talk to More Than One Attorney

Actually, meet a few lawyers. Ask every lawyer who else handles detachment and separation in the territory. On the off chance that they won’t give you names, leave the workplace, when you see names appearing on different arrangements of proposals, the chances are presumably great that the lawyer is doing these cases all the time.

Use a Checklist

I have delineated components that you ought to think about when choosing a separation legal counselor.

A. Experience. The more you have been rehearsing a specific territory of the law, the more you know. There is a familiar aphorism that says a decent legal counselor knows the law and an incredible legal advisor knows the judge! What is the contrast between a decent legal counselor and an incredible attorney? Experience.

B. Experience Trying Cases. Has he/she accomplished any preliminary victories for his/her customers? Will the legal advisor point to case results or customer tribute mirroring his/her capacities?

C. Is it accurate to say that they will settle when suitable to do as such? Preliminary lawyers once in a while experience the ill effects of an enlisted weapon mindset. They like the rush of difficult cases and may not think about different alternatives, for example, intercession or intervention to accomplish a goals. Most great separation lawyers don’t receive this methodology, however consider preliminary to be a final retreat, when different choices have neglected to hasten a reasonable goals of the issues. In contrast to different zones of the law, family law regularly involves continuous connections and thusly requires an alternate point of view. I as of late read an article by individual damage lawyer, who was composing on the best way to pick individual damage legal advisor. He said not to pick a legal counselor who settles a great deal of cases. With regards to division and separation, I trust it is critical to attempt to arrive at an understanding, on the off chance that you can.

How do you know if you have hired a bad attorney?

  • You have no idea what’s going on in your case.

If your calls are not being returned, your emails are unanswered for days, and you never see the documents that are being filed on your behalf, you may have a communication problem.

You need to direct the objectives of your family law case. Your attorney has a duty to communicate with you about what’s being filed, what is going on, and what the opposing party is communicating to your attorney.

Too many attorneys fail to communicate with clients, leaving their clients feeling completely in the dark. It is our belief that the client is part of the legal team. Because we see you as a valued team member, we need you to communicate with us as much as we need to communicate with you. We need to know what’s going on with you and your children and your ex. We need to know if your objectives change and that you agree with everything we are saying within our pleadings on your behalf.

  • You are not receiving regular bills or have no idea where your money has gone.

Fee disputes are the number-one reason attorneys and clients break up. We believe that transparency and predictability are essential for a healthy attorney/client relationship. We invoice clients two times every month in order to make sure clients are informed about everything going on in their case. We also utilize a hybrid fee agreement of flat fees and hourly billing in order to increase predictability and uniformity for clients. Additionally, clients have the option of a flat fee case. For a flat fee case, you pay a flat fee no matter how long your case takes. The actual flat fee will need to be determined based on your individual case and will be worked out with you and your attorney.

  • Your attorney isn’t listening to you.

Your relationship with your family law attorney is most definitely a relationship. She must understand your objectives. This is the most important part of my job. If you feel like your attorney isn’t listening or doesn’t understand your objectives, you may end up spending more time and money than necessary. Worse, you may end up with a result that you are not looking for. I start all my relationships listening to the client’s concerns, issues and circumstances. Next, we come up with a plan for their personal case. Every plan is different because every client’s situation is unique. Next, we plan to change and adapt as circumstances evolve. Oftentimes, we may think we know how someone will react, only to be pleasantly surprised by a settlement. Other times, what looks like an easy case may become very complicated by a job loss or third-party player. If you feel like your attorney isn’t listening, have a conversation. Tell her how you feel. If things don’t improve after that, it’s probably time to dump your lawyer.

Posted inLegal

Qualifications Of A Reliable Electrical Home Inspections

Electrical Installations

Application Requirements:

Wiring Diagram indicating the location of receptacles, lights, switches, and all other equipment to be installed. Include total numbers of each type of electrical device to be installed (i.e. individual receptacles, lights, switches etc).

Either a Homeowner of a single detached dwelling occupied as his/her principal residence or a Licenced Electrical Contractor may apply for a permit.

Completed Electrical application and Declared Value form.

Completed Homeowner Electrical Permit Declaration Form for homeowners wishing to do their own electrical installation.

All the above information must be submitted to the Zoning & Permits Office with your electrical permit application. Homeowner applicants must submit their applications in person. Your application visit will take less time if you complete the application, Declared Value and Homeowner Declaration forms in advance.

How to apply:

Please ensure you have gathered all required documentation before applying.

Apply online (Licenced Contractors only)

Guideline for Inspections and Audits

regularly inspects the electrical works carried out by Registered Electrical Contractors (RECs) in order to ensure that the installation and the REC, comply with National Rules for Electrical Installations and the Regulatory Arrangements

After registration with REC shall undergo two inspections, the first inspection shall be carried out in the first 6 months of registration. In the event the new REC passes the first inspection, he/she shall then be subject to an additional inspection within 6 months of the first inspection.

For the Application Inspection you need to present an electrical installation work. In case you are not able to present an electrical installation work for inspection within the given timeframe (6 months for the first application inspection and 6 months after the first inspection for the second application inspection) your application will be rejected. If the result of the application inspection is unsatisfactory

Routine Inspection

Every REC shall be inspected at least once annually. Inspectors generally select the installation for inspection from the certificates of the REC’s completed “Controlled Works” electrical installations.

If no electrical installation is available for inspection, periodic inspections or maintenance works can also be considered for inspection. If no work can be presented for inspection it may lead to suspension of the REC’s registration and ultimately to revocation of membership

Inspectors

Inspectors are selected on the basis of their competence, training, qualifications and experience in line with the requirements of the CRU Criteria Document.

Electricians on Thumbtack cost

Electrical inspections typically cost around $110 to $125 per session. However, the total cost will vary depending on a few factors, such as your home’s size. By requesting price quotes from electrical inspection services in your area, you can better determine the estimated cost.

Flat rates

Most electrical home inspectors quote a flat fee for performing an inspection rather than charging per hour. Many inspectors also issue official documentation that contains their findings for home inspections required by insurance or mortgage companies.

Cost factors

Your home’s (or building’s) size will play a big part in cost. Building size can increase the flat rate because it takes longer to inspect a larger building If you live outside the contractor’s service range, there may be an additional travel fee. Some companies charge a flat rate for travel and others charge a mileage fee, such as $1 per mile of travel outside the service radius.

What happens during an electrical inspection?

An electrical home inspection involves a thorough look at the electrical connections, installations and wiring in your home. Ultimately, the home inspector’s goal is to make sure everything is working correctly and that your electrical system complies with the code.

Inspectors operate under the National Electrical Code (NEC), which defines the requirements and standards that must be met in the U.S. for electrical systems. Every three years, the NEC is revised. And in 2020, updates involving service equipment supplying dwellings, GFCI protection and outdoor emergency disconnects were added.

Digital Electrical Inspection Checklists

What is an Electrical Inspection Checklist?

An electrical inspection checklist is an essential tool to determine if your workers and worksite conditions adhere to electrical compliance safety rules. Electrical equipment should undergo quality and safety checks before operating. Inadequate checks and poor training can lead to serious electrical injuries and fatalities.

What do Electrical Safety Checks Involve?

An electrical safety checklist accompanies a site walkthrough to identify and report on common electrical hazards. This involves checking if safety barriers and signs are in place, ensuring that tools and equipment are in pristine condition, and looking for exposed wiring that needs proper guarding mechanisms among others.

Reasons to Perform Electrical Inspections

An electrical inspection is performed by a qualified person who is trained and knowledgeable in the construction and operation of electrical systems. It helps to identify unsafe equipment, faulty installation, and unfollowed work practices

To Keep Electrical Hazards at Bay

OSHA recorded that electrocution is the most common hazard and one of the fatal 4 across the construction industry. Performing electrical inspections help prevent electrical hazards in the workplace and ensures a safe environment for all employees.

To Ensure Compliance with Regulatory Standards

Businesses need to comply with regulatory standards to prevent unnecessary incidents, lawsuits, and criminal investigations. Complying with OSHA’s electrical standards helps to protect employees from exposure to danger such as electric shock, electrocution, fires, and explosions.

Inspections

Inspections ensure that construction and trades work:

Matches the work described under the permit

Complies with the relevant bylaws

Meets safety, accessibility, and green building goals

Get a special inspection

A special inspection is an inspection of all systems and structures (in all or in part) of an existing building to:

Assess general code compliance

Identify upgrading requirements, including any permits needed for the work

When you need a special inspection

A special inspection may be required or recommended by City staff depending on the details of your project. Common scenarios that may require a special inspection:

An existing occupancy classification is changing to allow for a new business or tenant

Significant work has occurred without permits

A building has been damaged by fire

To determine upgrading requirements for a child daycare or community care space

You must provide written authorization from the building owner or indicate that you have permission from the building owner to apply.

Fees will be based on the number of separate inspections required at your building. Some inspections may require the expertise of more than one inspection type. Types of inspections may include a building, electrical, and/or plumbing and gas inspection.

Benefits Of A Home Inspection Before Selling A Property

Your property inspection checklist

Are inspections before you purchase a property really needed? Well, imagine moving into your new home and then finding out two months down the track that portions of the electrical system are not compliant, you have serious water leaks and a major borer problem? Enough said.

If you are considering buying a new property, use this checklist for your own inspection before engaging a professional inspector. This might help you rule out a property before going too far through the purchase process:

Is the house insulated?

Do you see any leaks, water stains or suspicious new paint anywhere?

Do you see any cracks or bulges on walls (could be due to subsidence, moisture or condensation)?

Is there sufficient natural light in the house?

Is noise control within the house adequate?

Are the hot water cylinder and header tank securely fastened?

Are there any water pressure/plumbing problems (check by turning on several taps at once)?

Also, turn on the shower to make sure it has good pressure and is hot.

If the property is connected to gas, are gas pipes working properly (turn on several outlets at once and make sure the flame is strong and high)?

Do all fans and rangehoods vent to the outside?

Are all windows and doorframes in good condition?

Do any of the windows stick?

Do all doors close properly?

Is there any mould in wardrobes, cupboards or bathrooms?

Are toilets and cisterns in good condition?

Are there any signs of damp?

Are there any signs of borer?

Get on the roof and check for any signs of rust or cracked tiles.

Do the gutters show any signs of rust or cracking?

Are metal flashings over windows and doors rusted?

Is there rust or staining on the exterior walls?

If it is a property with a plaster finish, are there any cracks in the plaster, in particular around windows, doors and corners?

Is there any dampness around windows and doors?

Go under the house and check the piles. Are there any missing piles or any that are no longer supporting the house?

Are the piles solid or is there any sign of rot?

Look for any floor problems that may be hidden from above.

Check for gaps in the flooring, dampness and borer.

Are the fences in good condition?

Other considerations:

Are there any protection orders over trees or buildings on the property?

What is the zoning for that property, as well as adjoining properties?

Is a LIM report available?

Is there, or has there been, a claim to the Weathertight Homes Resolution Service?

What is the government rating valuation for the property?

Have all building consents been obtained?

How much are the rates?

If the property has been rewired recently, is there an electrician’s Certificate of Compliance?

Is the property likely to flood in heavy rain?

Even if you are satisfied after completing your own inspection, it is still advisable to hire the services of an expert and independent building inspector to evaluate the structure of the house and provide feedback about other systems such as the roof, plumbing, electrical system, heating/air conditioning units, insulation, doors, windows and more. Some people do have a friend or family member who can perform an inspection, but make sure they have the required expertise to do a thorough evaluation of the property.

Home Inspection Red Flags to Watch Out For When Buying A Home

Buying a home is an exciting process, but many homebuyers are also understandably nervous. Buying a home is a big investment you’re going to have for years. That’s why it’s important to watch out for home inspection red flags that signal big problems. Some slight problems or minor defects are fixable with a bit of TLC, but some issues can seriously detract from your investment, and even endanger your health and safety.

Structural Problems

Structural problems top the list of home inspection red flags. Structural problems, like a cracked foundation or damaged load-bearing walls, affect the integrity of the entire home and signs of these problems should be taken seriously. When selling a house that needs work, some home sellers might not know about structural problems or they might not disclose them, so you may have to detect these yourself. A home inspector will include structural damages in their report, but you can find signs before you get to the inspection stage. Looks for these issues which may indicate structural problems.

Cracks in the basement floor larger than ⅓ inch

Bumps in the basement floor

Misaligned door frames or windows

Misaligned porch or front steps

Walls have been removed

Grading

The grade or slope of the surrounding property affects the way water drains during storms or snowmelt. This subtle feature can be a big home inspection red flag if it’s not done properly.If the property slopes towards the home, even at a slight angle, it will cause water to pool in or around the home, perhaps in the basement or around the foundation. If the property slopes away from the home, but the yard forms a valley where water pools, this can also cause flooding and water problems. When studying the grade, look for the following home inspection red flags:

The surrounding yard is completely flat

Patches of dead grass, moist areas or puddles

Property slopes toward the home

Moist areas close to the home

Mold

Mold is often a problem if you’re buying a fixer-upper. Sometimes mold results from neglect and it can simply be cleaned up, but other times it can be a serious home inspection red flag. The major deciding factors are the extent of the problem and the cause of the mold. If mold has occurred due to a lack of cleaning and it’s isolated to small areas, the problem may be easily resolved. However, if the mold occurs due to a lack of ventilation or accumulating moisture, the mold will simply come back if you clean it, and you’ll have to fix the cause to stop the mold. This might mean replacing drafty windows, or it might mean redoing the entire attic, roof, or bathroom to ventilate the area or stop a leak. Watch out of these mold-related home inspection red flags to detect really problematic mold issues.

Large patches of black mold anywhere in the house

A noticeable mold odor

Bathrooms without fans or windows

Large areas of patchy paint

Old Wiring

Faulty electrical wiring can make it difficult to run modern appliances, and it is a leading cause of home fires, which makes it a serious home inspection red flag. Electrical wiring is also difficult to fix, making it easy to lose money on this home renovation. Homes constructed before 1930 may use dated wiring methods like knob-and-tube wiring, which can limit power output and even cause electrical fires. These wiring systems are often complex and disorganized, making future renovations difficult and expensive. They can even cause home insurance providers to refuse coverage due to the increased fire risk. If the home was constructed before 1930, ask about electrical updates or ask your home inspector if they can determine the type of wiring used. You can also look for the following home inspection red flags yourself:

Flickering lights

Outlet faceplates are hot to the touch

Outlets aren’t grounded

Certain appliances won’t work or won’t work properly

Certain appliances can’t run together

How real estate agents can ensure safe home inspections during the COVID-19 crisis

how things have changed! Living and working in this pandemic era has brought many challenges to the real estate industry. Agents have all had to turn to a highly digitized office to move transactions forward. Zoom meetings, FaceTime, virtual tours, DocuSign and the ever-present email attachments now fill your workday at home

However, despite the many technical advances that home inspectors embrace, it is still largely an analog procedure of actually touching and manipulating the physical structure of the home. The value of our work is to discover the defects of the various systems and components that help define the quality of a house. These discoveries cannot be found without being on site.

Are there social distancing strategies that can make this process safer? Some have proposed agents doing live video tours of the home while the inspector makes notes for their report. An adjunct to this plan is to have the inspector visit later to open and inspect the utility systems in detail. Unfortunately, this defies quarantine guidelines because now two people need to enter the home. Also, how many agents are going to climb onto a roof or into a crawl space to view these critical areas? Not many, I think

There is also a proposal where the seller performs the video tour. This is an obvious conflict of interest because they can easily avoid known defects and may lack the motivation to visit dangerous locations such as the roof and crawl space. Under this scenario, the disclaimers in the report would likely outnumber the found defects. This also reduces the value of the report, and thus, the fee for the inspector. This will not be received well among my colleagues.

However, there is some middle ground. The International Association of Certified Home Inspectors has developed a training course for inspectors titled, “COVID-19 Safety Guidelines for Home Inspectors and Contractors” which will allow them to become certified in the protocols needed to improve services amid this emergency lockdown. In essence, the training calls for observing the same precautions we’ve come to use in our daily lives

Here are a few details proscribed in the training:

Personal and wardrobe hygiene

Disinfecting tool kit

Personal protective equipment, such as masks, gloves and shoe coverings

Touching as little as possible

Alcohol wipes for cleaning control surfaces

Digital payment and documents

Home Inspection Precautions COVID-19

Here are some of the precautionary steps we are taking to minimize risk for our clients, agents, and property owners:

[UPDATED March 26, 2020] I have completed the International Association of Certified Home Inspectors’ (InterNACHI) COVID-19 Safety Guidelines for Home Inspectors Course and will adhere to their recommended safety guidelines and standards. View certificate of completion.

I have Supra key access, so for homes secured on a Supra, the agent does not need to be present to grant access.

[UPDATED March 24, 2020] Although I encourage home buyers to be present for part (or all) of the inspection to meet face-to-face and walk through the property with me, at this time and following the recommendations of both InterNACHI and the CDC, we will be conducting virtual meetings with clients and agents until further notice. I always have been and will continue to be available for phone calls with clients to discuss findings, and I can also live-chat with them via video either at the home and/or after issuing my written report.

I take all necessary precautions when it comes to protecting the inspection property. This includes wearing shoe covers inside the home and gloves/additional PPE gear when necessary.

I practice regular hand washing or use alcohol-based hand rubs when a washing station is unavailable. I always wash my hands when they are visibly soiled during an inspection and after removing any PPE.

The inspection agreement is delivered to clients via email and they can easily submit their assent via electronic signature. Likewise, payments can be handled conveniently and securely as well via our online payment system.

Inspection reports are delivered to clients electronically via email link.

In all seriousness, home inspection is a fairly solitary process. Even before now, I quite often complete inspections completely on my own without direct contact with other people. If clients, agents or home owners are on-site during an inspection, I am respecting social distancing recommendations including maintaining a minimum distance of 6 feet from others and avoiding handshakes (which is particularly difficult for me! I’m a handshake kind of guy.) I am making every effort to protect YOUR health and am also taking precautions to protect those I love as well.

Tips for a Clean and Sanitized Home

As home inspectors, we are often privy to some of the more unseemly (and sometimes downright disgusting) areas of a home. We’re not just talking about disorganization. Yes, clutter has its own disadvantages, but even the most tidy homes can harbor unwanted germs. Here are a few simple strategies to keep your home as germ-free as possible

Home Air Filters

We’ve received quite a few inquiries lately about how often the air filter(s) should be changed out in a home. Clean air filters save energy and money. Routinely changing or cleaning the filters from your home’s heating and air conditioning system helps the units run more efficiently and enjoy a longer lifespan. In addition

“Filters help to keep dust from building up in your ducts, or being blown into other rooms of your house. In recent years, this air cleaning function has become more important to homeowners, and manufacturers have designed filters that use your heating and air system to remove microscopic particles like dust, pollen, pet dander, bacteria, plant and mold spores, and even smoke from the air in your home.”

Air filters – How often you change out your home air filters depend on a number of factors, including:

Type of filter

Overall indoor air quality

Number of pets in the home

Number of people in the home

Amount of exterior air pollution and/or construction around the home

Essential Property Buying Tips Before, During and Following Inspections

Prepare a Non Negotiable List

Getting to wander through gorgeous homes all day when buying a home is very exciting. However, it’s essential to not let the excitement cloud your judgement. It’s a practical idea to make a list of the must-have property features before open house inspections. A disciplined property buyer will check items off their list while you are at the open home to keep you on track.

Stay Focused on the Must Have’s

Things such as off-street parking, storage space, an extra bathroom, outdoor spaces, a garden shed; are all things you put on your list for a reason, knowing the lifestyle you currently have. Deciding ‘oh we’ll work it out’, because you got dazzled by the cute cottage with terrible local resident parking options, will be a real pain as you do laps of your own house late on a rainy night looking for a park.

Take Photos At the House Inspection

Once you arrive at the open home, ask for a floor plan from the real estate agent and take detailed notes as you inspect the property. You only need to see 3 or 4 properties before you start to forget which one had the ensuite and whether you even saw the laundry in that other one. Take some photos if you need to, to supplement the ones online, but also photos that correlate with your notes. Open doors, cupboards and windows. Check for touch up painting to hide cracks in a wall or ceilings. Be aware of how close earth is to floorboards, water drainage outside and stand in one spot to see if there is a damp smell.

Location, Location. Location

An open home inspection for property buyers really begins as your drive past the property once it is listed for sale. Take in what’s in the local area, what the traffic is like and how well maintained the streetscapes are. Look for warning signs such as overgrown nature strips, graffiti on fences or empty shops in the local shopping precinct. Once you have parked, check out the aspect of the property and where the sun is in relation to the house’s orientation. Depending on your location in Australia, the amount of sunlight the house gets can have a significant impact, not only on your lifestyle but your energy bills too. You want to get the most light possible in the winter months and have options to keep the property cool through the summer.

External Physical Inspection

As you approach the property, look at the external surfaces. Ideally the vendors have cleaned up and prepared the house for sale but there are always exceptions. Does it need repainting? Are the gutters and external drainage pipes in good condition or rusty? Are balconies well maintained?

Tax Preparation Career Overview

Understanding tax return preparer credentials and qualifications

Any tax professional with an IRS Preparer Tax Identification Number (PTIN) is authorized to prepare federal tax returns. However, tax professionals have differing levels of skills, education and expertise.

An important difference in the types of practitioners is “representation rights.” Here is guidance on each credential and qualification:

Unlimited Representation Rights: Enrolled agents, certified public accountants, and attorneys have unlimited representation rights before the IRS. Tax professionals with these credentials may represent their clients on any matters including audits, payment/collection issues, and appeals.

  • Enrolled Agents – Licensed by the IRS. Enrolled agents are subject to a suitability check and must pass a three-part Special Enrollment Examination, which is a comprehensive exam that requires them to demonstrate proficiency in federal tax planning, individual and business tax return preparation, and representation. They must complete 72 hours of continuing education every 3 years. Learn more about the Enrolled Agent Program.
  • Certified Public Accountants – Licensed by state boards of accountancy, the District of Columbia, and U.S. territories. Certified public accountants have passed the Uniform CPA Examination. They have completed a study in accounting at a college or university and also met experience and good character requirements established by their respective boards of accountancy. In addition, CPAs must comply with ethical requirements and complete specified levels of continuing education in order to maintain an active CPA license. CPAs may offer a range of services; some CPAs specialize in tax preparation and planning.
  • Attorneys – Licensed by state courts, the District of Columbia or their designees, such as the state bar. Generally, they have earned a degree in law and passed a bar exam. Attorneys generally have on-going continuing education and professional character standards. Attorneys may offer a range of services; some attorneys specialize in tax preparation and planning.

Irs annual filing season program – record of completion holders

The Annual Filing Season Program (AFSP) recognizes and encourages the voluntary efforts of unenrolled tax return preparers to increase their knowledge and improve their filing season competency through continuing education. AFSP – Record of Completion Holders must meet annual educational requirements set by the IRS and either take and pass an annual tax refresher course or have passed other IRS recognized state or national competency tests such as ACAT’s Accredited Business Accountant and Accredited Tax Preparer. (Read more on ACAT credentials below.)

Annual Filing Season Program participants are included in a public database of return preparers on the IRS website. Annual Filing Season Program participants have limited representation rights, meaning they can represent clients whose returns they prepared and signed, but only before revenue agents, customer service representatives, and similar IRS employees, including the Taxpayer Advocate Service. PTIN holders without an Annual Filing Season Program – Record of Completion or other professional credentials will only be permitted to prepare tax returns. For returns prepared and signed after December 31, 2015, they will not be allowed to represent clients before the IRS.

Accredited Tax Advisors (ATA) – These practitioners can handle sophisticated tax-planning issues. Their expertise covers tax returns for individuals, business entities, fiduciaries, trusts and estates, tax planning, and tax consulting. ATAs follow a code of ethics and complete continuing education requirements.

Accredited Tax Preparers (ATP) – These practitioners have a thorough knowledge of tax code and the preparation of individual tax returns. Their expertise covers comprehensive 1040 issues, including supporting schedules and self-employed returns. ATPs follow a code of ethics and complete continuing education requirements.

Ways to verify you have a reliable tax preparer

If you use a tax preparer to file your tax return for you, you give them a lot of delicate information. They know all about your finances, your marital status, your contact information, and they even have your Social Security number. So wouldn’t you want to verify that the person you’re handing that data to is someone reliable?

Your answer is probably yes, but according to a recent survey, roughly 80% of people who hire a tax preparer never ask about the person’s credentials or qualifications. If you choose to hire a tax preparer,  steps you should follow to ensure that the person you work with is reliable and qualified to handle your return.

Ask for their ptin

Anyone who is paid to prepare federal tax returns is required to have a Preparer Tax Identification Number, or PTIN. Be sure to ask anyone you hire if you can have their PTIN, and be sure to check it on the IRS’s directory of federal tax return preparers. Note, however, that volunteer tax preparers are not required to have a PTIN, only paid professionals.

Ask for other credentials

Getting a PTIN actually isn’t all that difficult, so it’s best if you work with a tax preparer who has other qualifications and credentials. You should only entrust your return to a certified public accountant, enrolled agent, licensed attorney, or someone who has completed the IRS’s Annual Filing Season program. All of these credentials require the individual to study, pass certain exams, and participate in ongoing education courses, which means you can be certain that they are up to date on tax laws and can handle your return appropriately.

If you want to find a tax preparer with specific credentials, you can search the IRS’s directory. This will show you tax preparers in your area that possess both a PTIN and some form of IRS-recognized credential. Volunteer preparers and those with only a PTIN are not listed in the directory.

Examine their fees

Flat-rate fees can be eye-catching and quite tempting when you’re looking to save a few bucks on preparing your return. But legitimate tax preparers usually charge by the hour. So, if you find a preparer that is charging based on the size of your return, you should be skeptical. Additionally, if the person is promising they can get you a bigger return than another preparer, this should be a major warning sign for you; legitimate preparers cannot make promises about the size of your return.

Make sure they e-file

If a paid preparer processes more than 10 returns for their clients, the IRS requires the preparer to file the returns electronically through their e-filing system. So, if your tax preparer does not offer the option to e-file, this is likely a sign that they’re doing as much tax prep as you thought. You’re usually better off working with someone who handles many returns in a single year.

Ensure they’ll sign the return

Any paid preparer is required to sign their clients’ returns and provide their PTIN when the return is filed. Make sure that anyone you work with is willing to do both these things. If your preparer gives you a return that they have not signed or that does not have their PTIN, don’t sign. And never sign a blank return—the preparer could put anything on the return after you’ve signed it, including their own bank account information, which would allow them to steal your refund.

Ask if they’ll have your back

When you work with a certified tax preparer that has both a PTIN and an IRS-recognized credential, you’ll have professional support and backing with the IRS if there are any issues regarding audits, payment plans, collection issues, or appeals. So, if you work with a preparer who doesn’t have a PTIN, or who has one but possesses no other professional credentials, you’ll be on your own if the IRS decides to audit you.

Eye Care Career Options Comparison

Blindness: Causes, Types & Treatment

What is blindness?

Blindness is defined as the state of being sightless. A blind individual is unable to see. In a strict sense, the word “blindness” denotes the inability of a person to distinguish darkness from bright light in either eye. The terms blind and blindness have been modified in our society to include a wide range of visual impairment. Blindness is frequently used today to describe a severe visual decline in one or both eyes with the maintenance of some residual vision.

Vision impairment, or low vision, means that even with eyeglasses, contact lenses, medicine, or surgery, someone doesn’t see well. Vision impairment can range from mild to severe. Worldwide, between 300 million-400 million people are visually impaired due to various causes. Of this group, approximately 50 million people are totally blind. Approximately 80% of blindness occurs in people over 50 years of age.

When is one considered legally blind?

Legal blindness is not a medical term. It is defined by lawmakers in nations or states in order to either limit allowable activities, such as driving, by individuals who are “legally blind” or to provide preferential governmental benefits to those people in the form of educational services or monetary assistance. Under the Aid to the Blind program in the Social Security Act passed in 1935, the United States Congress defined legal blindness as either central visual acuity of 20/200 or less in the better eye with corrective glasses or central visual acuity of more than 20/200 if there is a visual field defect in which the peripheral field is contracted to such an extent that the widest diameter of the visual field subtends an angular distance no greater than 20 degrees in the better eye. Blindness in one eye is never defined as legal blindness if the other eye is normal or near-normal.

What Causes Blindness?

Normal vision depends on a multi-faceted, complex process. Light enters the eye through the cornea and lens, with the iris helping to focus the image. The light is projected onto the back wall of the eye, where it is perceived by millions of tiny nerve endings that make up the retina. From here, the retina translates the images into nerve impulses that are transmitted to the brain through the optic nerve.

When any of these eye parts are damaged, either through illness or injury, blindness can occur:

  • The lens may cloud, obscuring the light entering the eye.
  • The eye’s shape can change, altering the image projected onto the retina.
  • The retina can degrade and deteriorate, affecting the perception of images.
  • The optic nerve can become damaged, interrupting the flow of visual information to the brain.

What are the main causes of blindness?

The two main causes of sight loss are uncorrected refractive errors and cataracts. This is closely followed be age-related macular degeneration (AMD), glaucoma and diabetic retinopathy.

These eye conditions can all be detected by your optician during a routine eye examination, and if caught early they can be treated effectively. This is why it is so important to visit your optician every 2 years and have your vision and eye health checked.

UNCORRECTED REFRACTIVE ERRORS

Uncorrected refractive errors, such as myopia, hyperopia or astigmatism, can all cause severe visual impairment. However, with the right corrective lenses, they can be avoidable. Refractive errors can sometimes go unnoticed or uncorrected, often in children where they do not recognise that something is wrong.

CATARACTS

Cataracts usually affect those aged over 65 but it is also a common side effect of conditions such as diabetes. Cataracts occur when the lens of your eye becomes less transparent and can cause your eyesight to appear cloudy.

Diagnosing cataracts is usually straightforward, and it can be detected during the type of tests you experience at a regular check-up with your optician. Surgery is a highly effective treatment for cataracts and is one of the most common procedures in the UK.

AGE-RELATED MACULAR DEGENERATION

It is not known what causes macular degeneration, except that it is closely linked to age. While it is a painless condition, you will begin to lose central vision as the macula in your retina begins to deteriorate.

AMD can make day-to-day activities increasingly difficult, but it could be between 5 and 10 years before vision loss significantly impacts your daily life. This gradual loss of vision can mean it often goes unnoticed for some time.

Your optician may detect AMD early during an eye examination, or you may begin to notice blurry central vision. If this happens, you should see your GP or optician. There is currently no cure for AMD, but there are a number of treatments available to help make life a little easier. The earlier it is detected the more effective management can be.

GLAUCOMA

Glaucoma happens as a result of a build-up of fluid and pressure in your eye. A regular eye examination will pick up signs of glaucoma through a tonometry test, which measures intraocular pressure.

The damage caused by glaucoma can be irreversible, so it is crucial that the condition is diagnosed and treated as early as possible. There are a whole host of treatments available for the different types of glaucoma,

If someone else in your family has suffered from glaucoma, your optician may recommend that you attend more frequent eye examinations.

DIABETIC RETINOPATHY

If you suffer from diabetes, you are at higher risk of developing problems with your vision due to diabetic retinopathy. This is a condition whereby the blood vessels in the eye are damaged by high blood glucose levels.

Early signs of diabetic retinopathy are usually picked up during a diabetic eye screening. If you notice your vision getting steadily worse or blurred, or you feel pain in your eyes, you should speak to your GP or optician.

Being aware of diabetic retinopathy if you have diabetes can be instrumental in preventing any future eye problems.

As you can see, some of the most damaging eye conditions can be prevented or treated if they are picked up early enough. By understanding the symptoms of conditions like glaucoma or myopia, you can take positive steps towards prolonging your vision and avoiding sight loss. 

What are treatments for blindness?

The treatment of visual impairment or blindness depends on the cause.

  • In third-world nations where many people have poor vision as a result of a refractive error, merely prescribing and giving glasses will alleviate the problem.
  • Nutritional causes of blindness can be addressed by dietary changes.
  • There are millions of people in the world who are blind from cataracts. In these patients, cataract surgery would, in most cases, restore their sight.
  • Inflammatory and infectious causes of blindness can be treated with medication in the form of

Low Vision

Low vision is vision loss that can’t be corrected with glasses, contacts or surgery. It isn’t blindness as limited sight remains. Low vision can include blind spots, poor night vision and blurry sight. The most common causes are age-related macular degeneration, glaucoma and diabetes. Visual aids can help people with low vision.

What is the definition of low vision?

Low vision is the loss of sight that is not correctible with prescription eyeglasses, contact lenses or surgery. This type of vision loss does not include complete blindness, because there is still some sight and it can sometimes be improved with the use of visual aids.

Low vision includes different degrees of sight loss, from blind spots, poor night vision and problems with glare to an almost complete loss of sight. The American Optometric Association defines low vision as two categories:

“Partially sighted”: the person has visual acuity between 20/70 and 20/200 with conventional prescription lenses.

“Legally blind”: the person has visual acuity no better than 20/200 with conventional correction and/or a restricted field of vision less than 20 degrees wide.

The ratio measurement of vision describes visual acuity, or the sharpness of vision, at 20 feet from an object. For example, having 20/70 vision means that you must be at 20 feet to see what a person with normal vision can see at 70 feet.

Who is most at risk of having low vision?

Anyone can be affected by low vision because it results from a variety of conditions and injuries. Because of age-related disorders like macular degeneration and glaucoma, low vision is more common in adults over age 45 and even more common in adults over age 75. For example, one in six adults over age 45 has low vision; one in four adults over age 75 has low vision.

Deep Cleaning Carpet Methods

Free Printable Cleaning Checklist

If you are anything like me, my friend, I just bet you are a bit overwhelmed by your house. Clutter happens, and before we know it, stuff is taking over, and the dust just keeps piling up. I hear you loud and clear, and even more to the point, I’m with you! That’s why I put together this free printable cleaning checklist. It will help you stay organized as you clean your home room by room, top to bottom.

Let’s talk about how to create a cleaning routine. Personally, I find it most effective to clean room by room. I know some people tackle one task at a time and do the whole house. However, for those of us with short attention spans, this method seems to be the most effective. Taking each room one at a time keeps us focused and interested!

Let’s say you clean your floors then wipe your counter. Well, there’s a good chance there will be crumbs onto your newly-cleaned floors. No good. There’s no use in doing things twice! I hope that this list is effective at helping you tackle the toughest messes in your home. When you’re done, kick up your heels and enjoy a nice beverage of your choice.

Deep Print Head Cleaning

If print quality does not improve by the standard cleaning of the print head, clean the print head deeply. Cleaning the print head deeply consumes more ink than the standard cleaning of the print head, so clean the print head deeply only when necessary.

Make sure that the power is turned on.

Press the Setup button.

The  (Setup) icon and “1” appear on the LCD.

Press the + button until “3” appears on the LCD.

Press the Black button or the Color button.

The printer starts cleaning the print head deeply.

The cleaning will be complete when the ON lamp lights after flashing.

Do not perform any other operations until the printer completes the deep cleaning of the print head. This takes about 3 minutes.

Check the print head condition.

To check the print head condition, print the nozzle check pattern.

The Ultimate Guide to Deep Cleaning the Toilet

As a Mom of two boys with terrible aim and poor toilet flushing abilities {this is seriously one of my biggest pet peeves!}, our toilets require frequent cleaning and disinfecting. Unfortunately, toilet cleaning involves much more than just swirling the toilet brush in the bowl with some cleaner, and often those areas on the outside of the toilet {and surrounding areas!} are the ones that are forgotten in our basic cleaning routines.

Cleaning the Toilet Bowl

For the most part, I think we are all pretty good at swishing the toilet brush around in the toilet bowl.  What we often miss; however, is cleaning the underside of the rim and the siphon jets {these are the holes underneath the rim where the water actually comes out}.  If you are starting to notice vertical stains along the sides of your toilet bowl, this is a sign that they need to be cleaned.  Often times, toilet brushes can’t quite get up into these spaces, and over time, grime builds up

To give your toilet bowl a real deep cleaning {without any harsh chemical cleaners}, pour some castille soap down the sides of the toilet and thoroughly scrub all areas of the bowl with a toilet brush.  Next add about 1/4 – 1/2 cup of Borax along the sides of the toilet and use your toilet brush to bring up some of the soap mixture from the toilet bowl to form a thicker foam

This should by thick enough that it sticks to the sides of the toilet bowl rather than just sliding down into the water {just add a little more Borax if it is not thick enough}.  Use a toothbrush to scrub away any grime around the rim and siphon jets.  To get up a little further into the jets, soak a paper towel with the foam and place it around a metal hanger to really get up into the jets.  If you are having trouble seeing these you can use a small mirror to get a better view.  Allow the foam mixture to sit for 10-15 minutes, give it a final scrub, and flush.

Removing Mineral Build-Up

If you have hard water and significant mineral build up in your toilet that doesn’t come clean with the cleaning method above, you just need to add an additional cleaning step.  Start by completely closing off the water supply to the toilet.  Next you need to flush the toilet until the bowl no longer fills and then plunge out as much water as possible.  If there is still water remaining, use an old towel to soak it up.   Once the bowl is empty, add some cleaning vinegar {or regular white vinegar if this is all you have} to the bowl to completely cover any stains.

If your stains are more up underneath the rim or along the sides, soak a rag or paper towels in the vinegar and place over stain.  Leave overnight and then scrub.  If all stains are not removed, you can either repeat the process again or try the same method with a product containing hydrochloric acid {HCL}.  Just be sure to follow the safety precautions on the product as this is a much stronger chemical.  Also note that bleach SHOULD NOT be used on rust stains as it can actually cause the stain to set.

Genius Ways to Deep Clean Every Inch of Your Home

Be it a 1BHK, 2BHK, 3BHK or more, maintaining a clean and hygienic home is a must. Scrub your way into a clean and happy home with our tried and tested cleaning tips for every room. From cleaning chimneys to removing stains from sofas, our home-keeping tips will help you streamline your approach on how to clean house. Keep this handy guide as you work on your cleaning skills and check out our exhaustive list to be sure you don’t miss a spot!

How Often Should You Clean?

There are certain basic cleaning chores that need to be done daily, other things can be done weekly or monthly. Remember, not everything requires deep cleaning frequently.

Doing the dishes, wiping the kitchen counters, wiping bathroom surfaces and cleaning sinks and bowls acts as a daily chore. Whereas, cleaning microwaves, bedding, mirrors, computers and dusting furniture is a weekly activity. Furthermore, monthly cleaning includes clearing out your fridge, wiping light fixtures, blinds, fans and washing machines. Lastly, seasonal cleaning is done during a festival or work that requires plenty of effort such as, moving out furniture to clean. Here, we’ve sorted it out and made an easy checklist for you to follow.

What Should You Clean Everyday?

Here we learn that making your bed first thing in the morning is a productive way to start the day. Moving on to sorting clothes, every piece of clothing has a place of its own. So, make sure to return it to its place. Wiping surfaces regularly is an important task in order to avoid a layer of dust from accumulating. Keeping shoes outside the home prevents dirt from being dragged into the house. Subsequently, doing dishes immediately is better than doing a stinky pile at the end of the week

Have You Cleaned These Spots Yet?

These are spots that, regardless of how much you clean, still hold on to a layer of dirt. For example, door handles and knobs that are hotspots for bacteria. Or, remote controls that should be wipes with an alcohol-based disinfectant.

Cleaning following a confirmed or probable case of COVID-19

Guidance on cleaning a room that has been used by a confirmed or probable COVID-19 case, including cleaning products and the personal protective equipment that may be required.

General principles

Good hand hygiene is essential to minimise transmission of infectious droplets to yourself, others, and other surfaces.

Hands should be thoroughly washed with soap and water for at least 20 seconds, making sure you dry them thoroughly. If soap and water are not available and your hands are not visibly dirty, use hand sanitiser (containing at least 60 percent alcohol). Cover all surfaces of your hands and rub them together until they feel dry.

Avoid touching the face (eyes, nose or mouth) to reduce the likelihood of transmitting the virus from contaminated surfaces or items.

Always wear disposable gloves when cleaning. When finished, place used gloves in a rubbish bin, then wash your hands immediately.

When cleaning, remember the following two principles.

1. Top to bottom

Start cleaning surfaces higher up and work your way to the floor. This method ensures that any particulates or debris fall to the floor which will be cleaned last.

2. Clean to dirty

Start by cleaning surfaces and objects that are cleaner and work your way to cleaning dirtier items (eg, toilets).

Avoid going from an area that has not been cleaned to an area that has been cleaned. This avoids dirtying the cleaned area and will ensure you aren’t cross-contaminating items or surfaces.

Cleaning products

Coronaviruses can survive on surfaces for many hours but are readily inactivated by cleaning and disinfection. Any hospital grade detergent/disinfectant products are suitable for cleaning following a confirmed or probable case of COVID-19. Always follow the directions on the label. The label will include safety information and instructions for safe and effective use of the cleaning product, including precautions you should take when applying it. Specific personal protective equipment (PPE) and dwell time (how long the cleaning product should remain wet on the surface before drying) should be included in product instructions.

Perform hand hygiene then:

put on gown or apron

put on mask

put on protective eyewear (if the cleaning product manufacturer recommends eye protection, wear a face shield or goggles. Note that prescription eyeglasses are not classed as eye protection)

put on gloves (these can include heavy-duty household gloves).

How Do Male Bat Court Females To Mate

A guide to dealing with bats in the attic

Dos and don’ts when it comes to bats

Bats are an endangered species and are protected by law, which means it is a criminal offence to try to kill or remove bats or to change/block their roost. If you’ve discovered bats are roosting in your dream home, you either need to forget about the property, or accept that you’ll have a brood of small and furry tenants living in the loft.

If you don’t want to give up on the property you’ve found, then you should read through the points below about why bats are less of a problem than you might think.

1. Bats are clean and sociable animals; they are not rodents and will not nibble or gnaw at wood, wires or insulation.

2. Bats don’t build nests, so they won’t bring bedding material into the roost.

3. Most bats are seasonal visitors to buildings, so are unlikely to live in the same place all year round – although they do tend to return to the same roosts year after year.

4. Female bats usually have only one baby each year, so properties don’t become ‘infested’.

5. All bats in the UK eat insects and are actually a great form of natural pest control.

On the other hand, there can be implications for any building or remedial work you may want to have completed. You will need to gain permission to undertake any timber treatment, which is normally allowed when the bats are not present.

How To Get Rid Of Bats In Various Scenarios?

What Are Bats?

Many people believe that bats are mysterious mammals. They are the only mammals that are capable enough to fly rather than to glide.

In some places, people believe in superstitions that it is a bad sign if bats enter the house.How much ever brave a person might be, if a bat enters the house, there is no surprise if the person panics.

Actually, bats are helpful to humans in the way that they eat away the insects that are harmful to man. However, their existence is still a nuisance to many people as they make scratching and squeaking sounds from various places where they roost.

It is illegal and inhumane to kill bats. Therefore, follow methods to send them out without hurting them. Many people find it very difficult to get rid of these mammals as they might become aggressive in certain scenarios when they want to secure themselves. However, there is no need to worry if you know the way to manage without endangering yourself or bats,while getting them out.

How To Free Your Home From Bats?

A bat unintentionally enters a house, generally after the dark. It generally happens when a window or door is open or they may fall through an opening of a chimney or any outlet on the exterior of the house. They appear big while flying, but even an opening of ½ cm diameter is enough for them to enter.

How to get rid of bats in your house

Whether it’s a single confused bat or a whole flappy family living in the attic, or a maternity roost in your roof space, knowing how to get remove bats in the house may be something you’re unfamiliar with. Here we’ll provide an easy guide for bat removal and ensuring you don’t break the law.

Dos and don’ts when dealing with bats:

Before we show you how to get rid of bats, there are a few important things you should be aware of.

DO contact a professional. Whilst it is unlikely you will ever face an ‘infestation’ of bats, always contact a professional to ensure that you remove bats in the roof safely and appropriately.

DO aim to remove them before the mating season. Bats breeding places are protected, so sorting out the removal of bats before the mating season will prevent one or two resident bats from turning into a whole family, as well as following regulations.

DO make sure you are well-informed about bats. Bats are misunderstood creatures to the general public. Whilst some species of bats can produce harmful excrement, UK bats have no known health risks associated with them.

DON’T break the law! Bats are a legally protected species. If you need help or advice in your home contact the National Bat Helpline. You will get free advice, information, and help.   

DON’T capture a bat in your house.

DON’T use pesticides or poison. Bats are not pests. In the UK they are a form of pest control themselves as they love to feast on bugs! Other creatures like rats are pests and do need to be dealt with more urgently

How to get a bat out of the house: Easy steps to remove bats in the roof and keep them out

If you find bats living in your house, it is best to call the National Bat Helpline for advice. With bats being a protected species, taking to right steps in removing them safely is very important.

Bats

Several of these species—pallid bat (Antrozous pallidus), big brown bat (Eptesicus fuscus), Yuma myotis bat (Myotis yumanensis) and other Myotis species, and Mexican free-tailed bat (Tadarida brasiliensis)—frequently use man-made structures such as attics, barns, or bat boxes for roosting sites and are the species you most likely will find in urban areas

Bats have relatively long lives—5 to 30 years depending on the species—and are among the slowest reproducers for their size of any mammal. For example, the little brown bat, the most frequent user of artificial bat habitats in the United States, can live for 3 decades with the female giving birth to 1 pup per year.

In most cases, bats don’t cause problems for homeowners or gardeners, and because of their nocturnal habits, you rarely will see them. Because they eat insects, bats also might provide some control of insect pests in the landscape.

Problems that do occur often happen when migrating bats roost in buildings, usually during warmer months. Their droppings can accumulate, they can make noise, and some people are uncomfortable with close proximity. Bats also can transmit diseases, with rabies being a special concern.

BIOLOGY AND LIFE CYCLE

As mammals, bats have fur, give birth to living young, and provide their young with milk. In spring, female bats form colonies to give birth and rear young. Roosting sites include buildings, bridges, or other structures as well as caves or tree cavities. Adults leave roosts at night to forage for insects. Young bats develop rapidly, and most are able to fly within a month or two after birth. Generally males and females with young will roost separately, but in late summer or fall, males might join the colony, and bats might migrate to warmer areas or hibernation roosts in the winter when insects are scarce.

Managing Bats in Buildings

Bats help the ecosystem by eating insects, including crop, forest and human health pests. Bats can eat up to half their weight every night. All 15 species of bats in B.C. are protected from being killed or harassed under the Wildlife Act, and many are listed species-at-risk or endangered. Bats need our protection, including conservation of colonies that live near humans.

Bats may cause some concerns, but many people live safely with bat colonies that are separate from their living space. Bats can carry fleas, mites, ticks and bat bugs (which are similar in behaviour and appearance to bed bugs). These pests are specific to bats and don’t usually affect humans

Bats may also carry rabies, but this is rare. Less than 1% of wild bats have the rabies virus. However, because rabies is fatal if not treated, you must never touch a bat with bare hands. Contact public health or a physician if you have been bitten or scratched by a bat. If a pet has been in contact with a bat, contact a veterinarian for an assessment. 

Removing Bats from Buildings

If bats are roosting in an area that isn’t interfering with human activity, consider leaving them undisturbed. They won’t destroy wood, wires or insulation.

If a bat has entered the living area of your building, try getting them to leave on their own by:

Closing interior doors

Opening outside doors and windows

Turning off the lights

A sleeping bat inside a house can be safely picked up:

Always wear thick gloves if handling a bat

Use a pillowcase or a box to gently trap the bat

Place the bat outside in a safe spot, out of reach of cats or other predators. Select a place where the bat can swoop down to take flight (for example, high on a porch, the top of a vehicle, or a tree branch)

Bats are protected under the Wildlife Act. Certain actions are illegal and ineffective for bat removal.

Do not use pesticides

Do not play loud music

Do not use ultrasonic devices

Do not scatter mothballs

Do not set up bright lights